
Enough theory, time to start taking
things to bits.
Taking the Saturn Apart
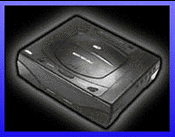
Here' what you start off with, a nice 'new' model Saturn.

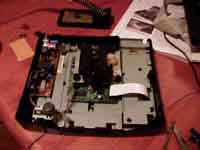
Remove all the 'external' screws and lift off the top casing.

Now you need to take out the power supply from the left hand side of the Saturn.
First remove the 2 screws at the back, either side of the power input.
Then remove the 2 screws holding the power button
to the base. Now lift the power supply out

The next thing to go is the CD-ROM unit. This has a thin ribbon connector on its right, and a power supply connector on its left.
Remove these 2 connectors from the CD-ROM unit, and the lift it out.
There may be a thin grounding strip connected between the CD-ROM and the metal below. If there is, unscrew this from the metal and you can then remove the CD-ROM.

You now need to remove the metal plate to get at the board underneath. Remove all the screws (there are a lot of them) then just lift the metal plate out.

That's eveything taking to bits - now just lift the board out of the base.